Getting to Know Arduino IDE Program
25332 Views |

Arduino IDE Program is a program that is used for programming controllers and can convert such files to upload to the Arduino board. We can choose to use the program online IDE or desktop IDE (for this article. will describe only the Desktop IDE used with Windows OS only).
1.Online IDE (Arduino Web Editor) Program will write programs through the website by various information that we write will be stored on the Cloud, which makes it convenient to use anywhere. We also do not need to update the program or library. Can be accessed at https://create.arduino.cc/editor
2.Desktop IDE Program is an offline program, that is, we have to download the program at https://www.arduino.cc/en/software. Which will be selected according to the use of our OS, here we will download the Windows Win 7 and newer and then install the EXE file that we downloaded.
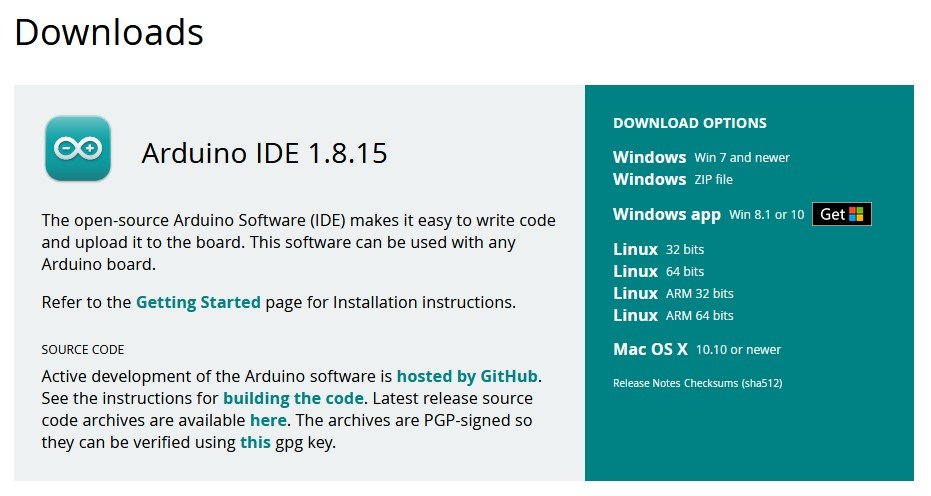
Picture of the Download page on the website (Update : 9-9-2021)
Installing the Arduino IDE program
1.When the program has been downloaded successfully. To do a double click on the program to start the installation.

Arduino IDE installer image
2.The program will start the installation process, press the I Agree button.
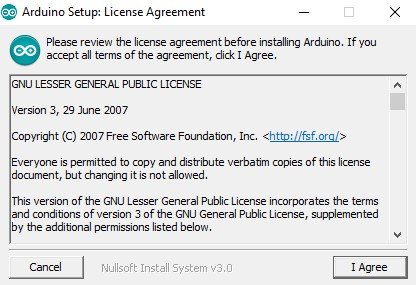
Picture of frame agreements
3.Select all components, then press the Next button.
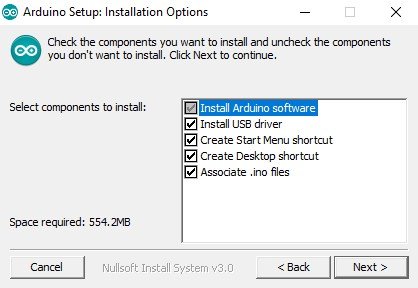
Pictures of the components to be installed
4.Select the location where you want to save the program (usually the program is stored at the location C:\Program Files (x86)\Arduino), then press the Install button.
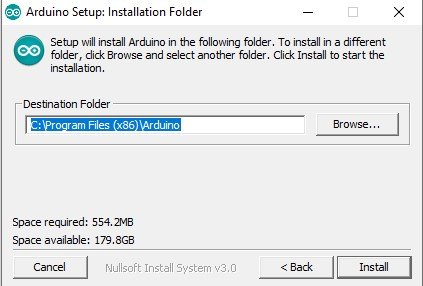
Picture of the location where the program is stored
5.After pressing the Install button, the program will install. Please wait until the program installs successfully.
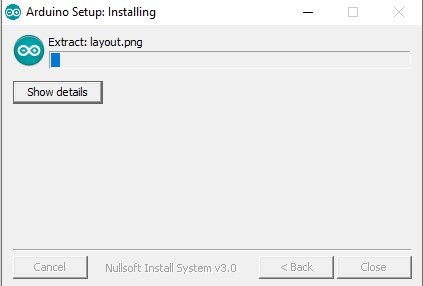
Picture of while the program is being installed
6.When the program has finished installing, the screen will show "Completed", click the Close button to complete the installation.
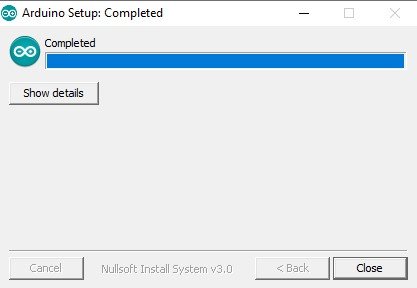
Picture when the program has finished installing
Using the Arduino IDE program
The Arduino IDE consists of a menu bar, a shortcut menu, a control program area, and a program status area. The program can upload data to the Arduino board and contact directly. In programming the control program of Arduino IDE, we will call it Sketch. By writing this Sketch, it is written in the form of text and saved as a file with the extension ino, which we can write, delete, search and change the text.

Picture of components of the Arduino IDE program
Components of the Arduino IDE program
The menu bar contains File, Edit, Sketch, Tools and Help.
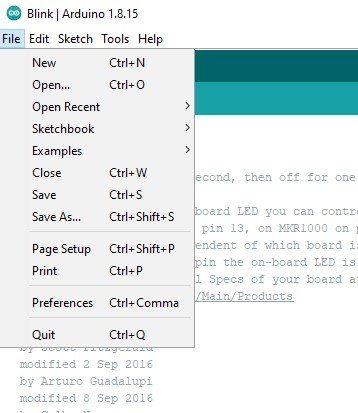
Picture of the submenu of the File menu
The File menu has the following sub-menus.
1.New used for creating a new window to write Sketch.
2.Open is used to open the Sketch that we have saved.
3.Open Recent is used to open the Sketch that we used to open. There will be a name for us to choose from.
4.Sketchbook
5.Examples are used to open sample programs in the Arduino IDE program.
6.Close is used to close the program Arduino IDE, only the page that we press to close.
7.Save is used to save the Sketch we are writing. If we haven't recorded it before A window will pop up for us to enter a name and select the recording area.
8.Save As is used to save the name of a different Sketch.
9.Page Setup is used to set the printing area of the printer.
10.Print is used to print the part of the control programmer area to the printer.
11.Preferences Used to open some settings window of the Arduino IDE program to suit the use.
12.Quit is used to close every window of the Arduino IDE program.
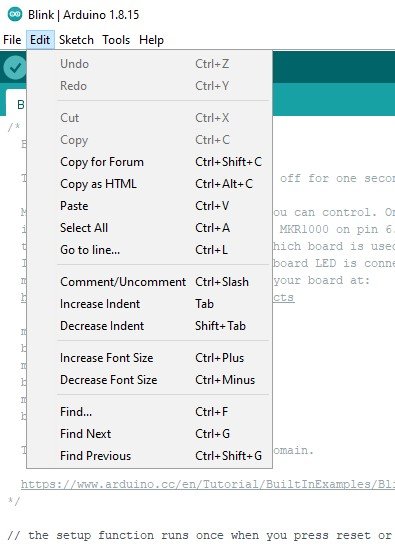
Picture of the submenu of the Edit menu
The Edit menu has the following sub-menus.
1.Undo is used for reversing the previous work.
2.Redo is used to move the action up 1 time (this command can be used when Undo is pressed first).
3.Cut is used to delete the text that we typed in the driver programming area. (You should highlight that message before using this command)
4.Copy is used to copy the text that we have highlighted in the control programming area.
5.Copy for Forum is used to copy all messages in the driver programming area. to be placed in various document programs in the same way.
6.Copy for HTML is used to copy all text in the driver programming area. to be placed in various document programs in the form of HTML.
7.Paste is used to paste the text that we used to copy. into the control programming area.
8.Select All to select all text highlights.
9.Go to line to set the position of the cursor to the position we want.
10.Comment/Uncomment Used to define the line that the cursor is on. Is it descriptive or non-descriptive text?
11.Increase Font Size is used to increase the font size in the control programming area.
12.Decrease Font Size is used to reduce the font size in the control programming area.
13.Find is used to search for a message or search for a message while making changes to it.
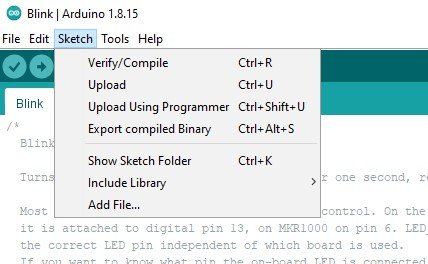
Picture of the submenu of the Sketch menu
The Sketch menu has the following sub-menus.
1.Verify/Compile It is used to check the code that we have written. whether there is an error or not with comp file.
2.Upload is used to compile the code that we have written. and upload directly to the Arduino board.
3.Upload Using Programmer is used for compiling the code we have written. and uploaded to the programmer.
4.Export compiled Binary is used to compile the code we have written. and convert it into a HEX file into the folder of the program that we saved.
5.Show Sketch Folder is used to view the location of the Sketch file we are writing. that in which position.
6.Include Library is used to call the library that we want to use.
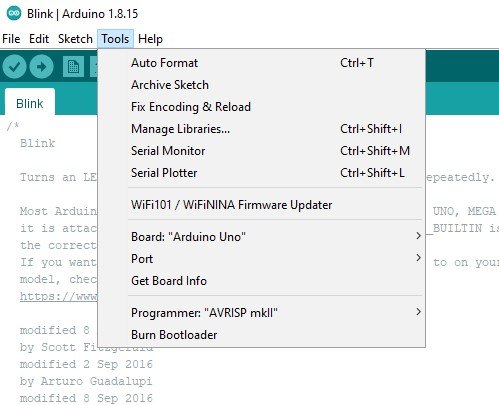
Picture of the submenu of the Tools menu
The Tools menu has the following sub-menus.
1.Manage Libraries is used for accessing various library management.
2.Serial Monitor Open the Serial Monitor window (will only work when The board is connected to the computer).
3.Board: “……………..” Used to select the board to match the board we use.
4.Port is used to select the Com Port that the Arduino board is connected to.
5.Burn Bootloader is used to load the Bootloader to the Arduino board.
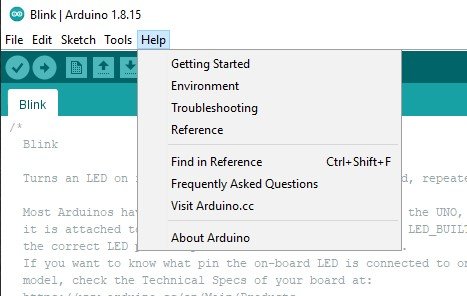
Picture of the submenu of the Help menu
The Help menu has the following sub-menus.
1.Getting Started is a link to learn basic usage from Arduino board, program download, program installation, driver installation of board, etc.
2.Environment This is a link to learn about using the Arduino IDE program.
3.Troubleshooting It's a link that combines various problems. and corrective guidelines.
4.Reference is a link to the page to learn various commands.
5.Find in Reference is used to find references of various commands. By placing the cursor at that command and then pressing this command.
6.Frequently Asked Questions is a link to frequently asked questions.
7.Visit Arduino.cc is a link to the website. https://www.arduino.cc
8.About Arduino is used to view the version of the program Arduino IDE.
2. Shortcut menu
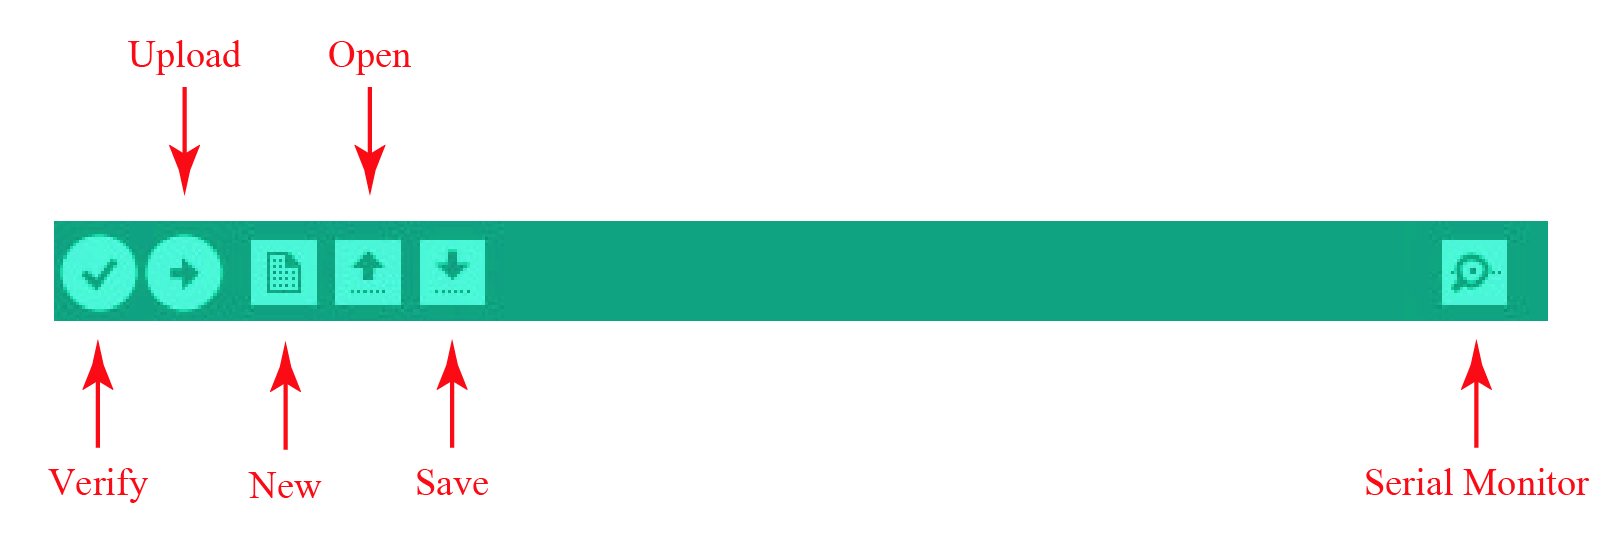
Shortcut menu image
1.Verify button is used to verify the code we have written. whether there is an error or not with comp file.
2.The Upload button is used to compile the code that we have written. and upload to Arduino board.
3. New button is used to create a new window to write Sketch.
4. The Open button is used to open the sketch that we have saved.
5.The Save button is used to save the sketch we are writing. If we haven't recorded it before A window will pop up for us to enter a name and select the recording area.
6. Serial Monitor Button Opens the Serial Monitor window (only works when The board is connected to the computer).

Serial Monitor window image
3.In the program status area is the area where messages are displayed while we are recording, sending data, showing where Sketch went wrong, and other indications of the program's status.

